|
The go-to place for all IBM PS/2 and Micro Channel enthusiasts
|
|
|
Before You Begin
|
|
Preliminary
speed Check Using SysChck
SysChck
is a utility located on the Trinity Works Utility
Disk or download here. It measures different
components in your computer. Trinity Works uses
this utility to measure the CPU speed and CPU
Throughput speed. you can measure the performance
of your computer by running SysChck before and
after the upgrade. SysChck must be run in DOS.
It cannot be run in the DOS shell through Windows.
Accessing
SysChck
- Insert
the Utilities diskette into the 3.5" floppy
drive or locate downloaded copy.
- If
you are in:
Windows 95, select "Shut Down"
from the "Start" button.
Select "e;Restart the Computer in MS-DOS
mode?"
Windows 3.1, select "File"
from the "Program Manager"
Select "Exit Windows" (and confirm)
- Change
to the applicable drive (A: )
- Change
the directory
cd syschck (enter)
- To
execute the program, type SYSCHCK at the A:\SYSCHCK
prompt.
- Press
"9" for SPEED. This will display
the throughput and CPU speed.
- Record
your speed and throughput for future reference.
Before
You Begin the PowerStacker Installation
The
PowerStacker 5x86 installation should not take
long to complete, however, please allow plenty
of time to finish. Before beginning the removal
of the old 486 and installation of the 5x86,
there are several details to be addressed.
- Start
your computer and verify that there are no
hardware or software problems before you begin
the installation.
- Back-up
all data from your hard drive and record all
CMOS settings.
- Verify
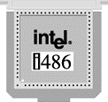
the type of processor socket you have.
- Take
note of the position and orientation of Pin
1 (identified by either a notch, beveled edge,
dot or half circle) of the 486 CPU before
you remove it.
CPU
Configurations
The
following is a list of common ways the CPU may
be configured on the motherboard.
If
you have a ZIF socket with an overhead bar or
any 168-pin socket, call or e-mail Trinity Works
Technical Support at 1-888-STACK-97 BEFORE
installing the PowerStacker.
|
 |
Configuration
1
Standard Socket without an OverDrive socket
You
will remove the 486 processor with the chip
extractor tool and install the PowerStacker
5x86 into the empty standard socket. |
 |
Configuration
2
ZIF (Zero Insertion Force) Socket
You
will unlock the socket using the side bar
or retaining screw, remove the 486 processor
and install the PowerStacker 5x86 into the
empty ZIF socket. |
 |
Configuration
3
Standard Socket WITH an OverDrive Socket
If
the 486 is in the standard socket, you will
remove the 486 processor with the chip extractor
tool and install the PowerStacker 5x86 into
the empty standard socket. Do not use the
OverDrive socket. |
 |
Configuration
4
Soldered CPU WITH an OverDrive Socket
The
486 processor cannot be removed. You MUST
install the PowerStacker 5x86 into the OverDrive
Socket. REFER TO YOUR OWNER'S MANUAL TO
SET THE NECESSARY JUMPERS. Do not attempt
to remove a soldered chip. |
|
|
If
your computer has a standard or ZIF socket,
read the following steps for removing the 486
processor. If your computer has a surface-mounted
processor, which is soldered on the system board,
you need to find the OverDrive socket on the
system board and go directly to "5x86 Installation".
If you have a 486 soldered to the system board
and DO NOT have an additional socket or OverDrive
socket, the upgrade can not be installed in
your system.
NOTE:
If you have a ZIF socket with an overhead bar
or 168-pin socket, you need a socket extender
(not included with some versions). If you have
one of these socket types, DO NOT attempt to
install the PowerStacker. Call or e-mail Trinity
Works Technical Support at 1-888-STACK-97 and
we will send you a chip extender at no cost
to you. If requesting by e-mail, please include
your name, address and phone.
|

|
168-Pin
Socket
Extender IS needed
|
 |
Overhead
Bar ZIF
Extender
MAY be needed |
|
|
|
|
|