|
190-060 PS/2 External CD-ROM Drive Model 001
193-182 Enhanced External CD-ROM II Drive Model 005
191-053 PS/2 SCSI Storage Enclosure (3510-0V0)
SHS91F9233 IBM PS/2 SCSI External Storage Enclosure (BOO)
Warning! The 3510-020 is a clone-boxen enclosure!
It's black and angular, unlike the rounded edges of the PS/2 machines.
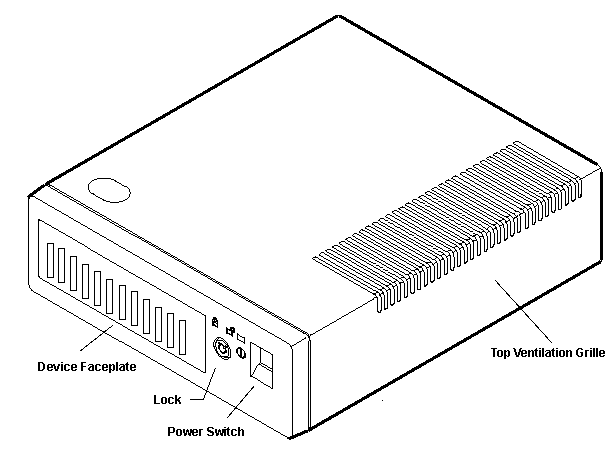
3510 Enclosure

This little bad boy is the Cadillac of external single device SCSI
enclosures. It has top and bottom ventilation grilles for the 35 watt PSU. I
would bet that these would be sufficient for a CD-ROM.
The HD enclosure has a cylinder lock similar to those on the 95 series.
Open the 3510

Unscrew the single standard screw above the C-50 passthrough
connectors. Pull the top cover forward about 3/4", lift it straight up.
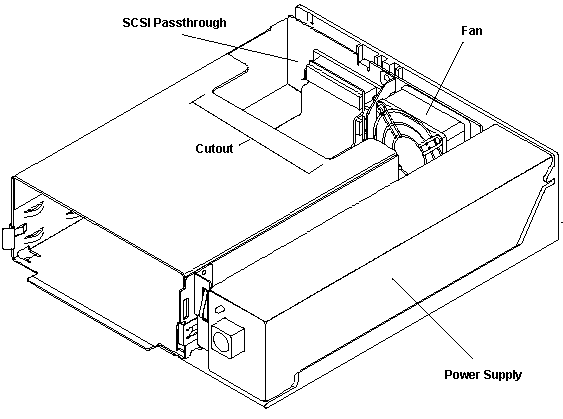
3510 Layout

Cutout
Looks like the cutout was added for later 3510s to make it easier to hook up
cables. My 3510-001 lacks the cutout and it's a little difficult to plug the
SCSI and power connectors in.
Open a Locked 3510
David Ress was faced with a locked box of goodies, but managed to open
it:
Equipment:
1) Louis for good ideas
2) Hot coffee, decaf so your hands do not shake
3) Long nose needle plyers
4) Pocket screwdriver
Method:
1) Remove screw on back, slide cover forward, will go about 0.25 inches
2) Turn unit over.
3) Look between cover and bottom, and you will see the lock
4) Wedge pliers down onto nut, and turn.
5) Repeat 5 until nut freely turns with screwdriver blade
6) Once nut falls off, use screwdriver to remove lock nut.
7) With lock nut off, use screwdriver to remove locking bar.
8) Turn case over, slide cover off!
Us, god-Emperor of Microchannel
If the lock is too tight to allow the top to slide forward enough
to get at the nut:
Remove cover screw at back. Remove the four screws from the bottom.
Using a standard screwdriver, carefully pry the side away from the rear
corners. There is a rib on the upper cover that slides into a matching slot on
the plastic base.
Slowly! After both sides have been pried up and past the slot, this now
allows you to turn 'er upside down, and let the metal frame hang down at
back.
The rear pins are about 3/16th of an inch high. That's all you need. Now,
notice the two slots in the plastic base at the front. Notice the metal tabs?
Pry the plastic base to the rear. Remember, don't let the metal frame settle
back down on the pins! Even better, there are two holes that the rear pins can
fit into. Let 'er hang.
Now slide the PSU backwards. This should give you enough room to get in and
take the nut off the lock and remove the catch.
3510 PSU
Made in Taiwan, API-8381, P/N 84F9453 Universal 32-watt power supply
Autoranging, 110 - 125 V @ 2 A / 200-240 V @ 1 A, 50/60 Hz
DC Output:
+5 V (+/-0.5 V) / 1.6 A
+12 V / 0 - 2.0 A
+12 V / 0.2 A (fan)
Remove PSU
Open case. Remove both standard screws from bottom of case under the PSU.
Pull PSU out, unfastening the +12v to fan and the 4-pin Molex on the SCSI
device.
PSU Fan Mounting
On my 0V0, the fan points inwards. The mounting screw thread is 4mm x 0.70
pitch.
PSU Fan Model
Sanko Denki Brushless DC Pico Ace Model 109P0612M402, 12 V / 0.07 A
2.36" square. .980" deep.
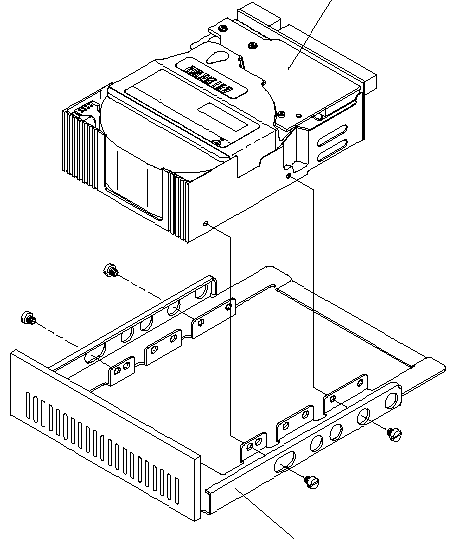
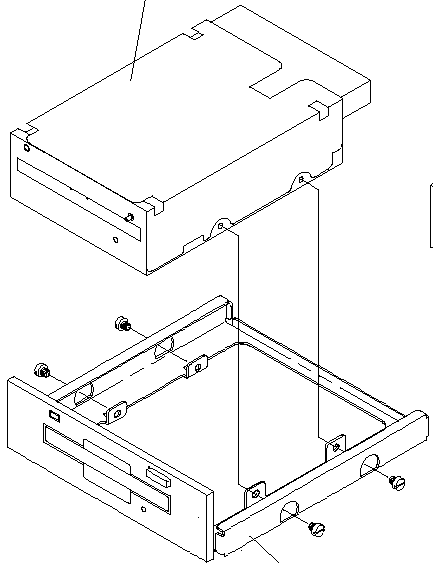
Drive Mounting
This enclosure can use the AT style rails for 5.25" drives, slides from the
85/95 series for 3.5" devices, or it's own special rail/faceplate slides.
Hard Disk Drive Tray with Bezel

Hard Disk Drive Tray with Bezel is 64F4108.
127MB Rewritable Optical Drive

The tray with bezel is 85F0021.
|